|

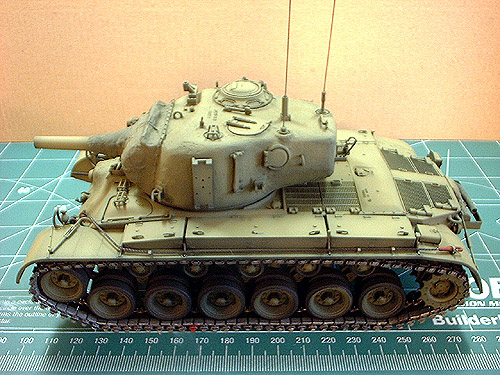
The left-side track run in
place in the above photos. It took me quite
a long time to clean-up and assemble AFV
Club's track-links - several hours just for
this run alone. I have mixed feeling about
them, but am happy with the end result. In
building my Tamiya Pershing, I noted that
the road wheels do not have a positive,
tight, lock on the suspension arms. This is
the first time I encountered such a sloppy
fit in a Tamiya model, and since no one else
has mentioned this in a review (that I've
read to date) I thought I somehow didn't
assemble them properly. That would be hard -
as there's only a polycap to trap between
the two wheels.
This problem in my model
kit lead me to undertake the following in
attaching the tracks to my miniature:
First - I assembled the
track run (83 AFV Club track-links per side
even though the box says 82 per run) and
wrapped a section around the Drive Sprocket.
Second - I attached the
outer wheels for the Return Rollers.
Third - I mounted the Idler
Wheel, and then all the Road Wheels into
place. The tracks themselves helped to set
the alignment of the loose-fitting wheels.
The way AFV Club's track links assemble, 82
per side was just too tight. One more link
provided realistic tension - and kept the
Road Wheels in place while the glue set. The
end connectors remain remarkably "wiggly" -
even when set into place with glue. I'd
straighten these out in the end assembly and
not stress myself out trying to do so for
every in-progress photograph.
|
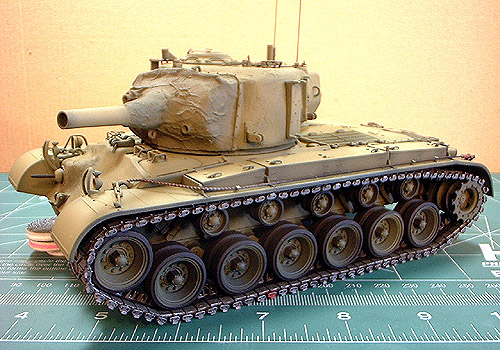
The
tracks are painted with a base coat of
Tamiya XF-1 Flat Black. I then wanted to
paint a representation of the rubber swath
often left on the steel track shoes during
use. I secured the entire run to a piece of
cardboard and masked off the two wheel
swaths with Scotch Plastic Tape #06404. This
is a low-tack tape that's excellent for
masking duties, even over compound curves.
The tape is 1/8 inches wide - just right for
application here on my model. After
weathering, dusting, and a DullCote - this
detail will enhance the appearance of the
model overall.
The
steel color is a mixture of 90% Tamiya XF-56
Metallic Grey and 10% Tamiya XF-1 Flat Black
- cut 50-60% by Lacquer Thinner. The red on
the main end connector is thinned Tamiya
XF-7 Flat Red, added for a little visual
interest.
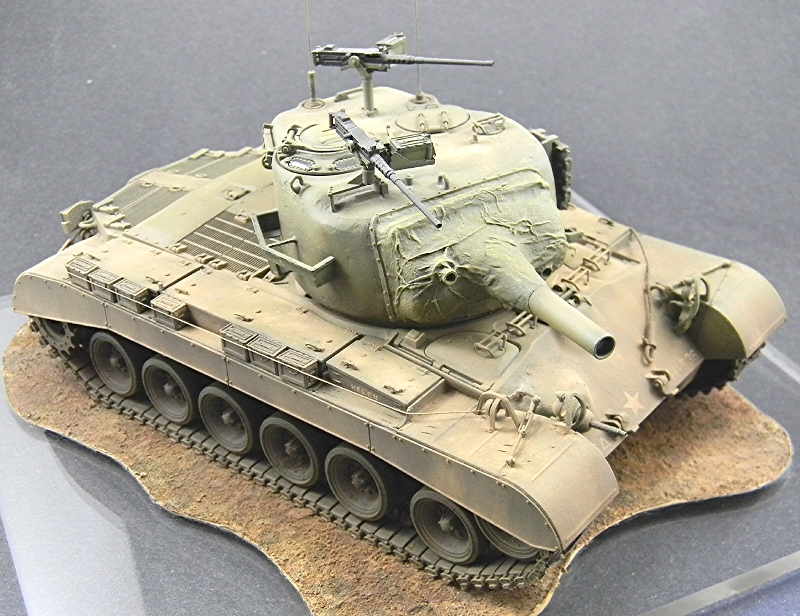
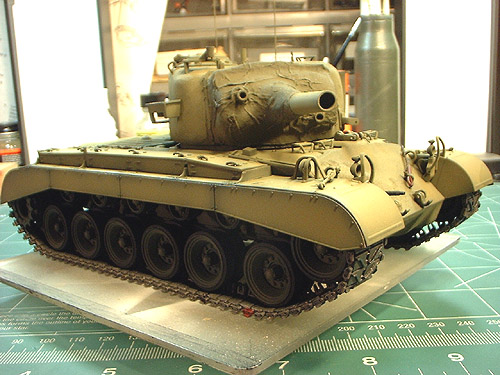
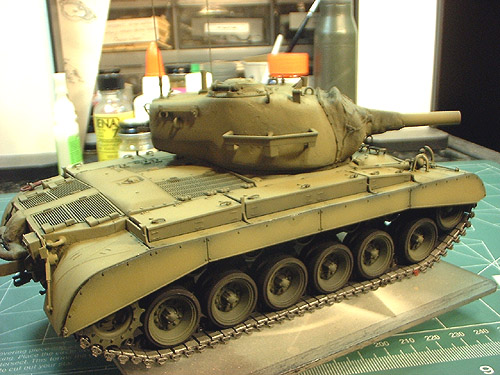
I
temporarily attached the Skirts after
finishing up the track runs to see what the
model tank would look like in the end. At
first a little curious about the spacing
between the first and second road wheels on
the right side of the model - consulting
photos of the Pershings made me feel better.
It is an accurate feature of the actual
vehicle - kudos to Tamiya.
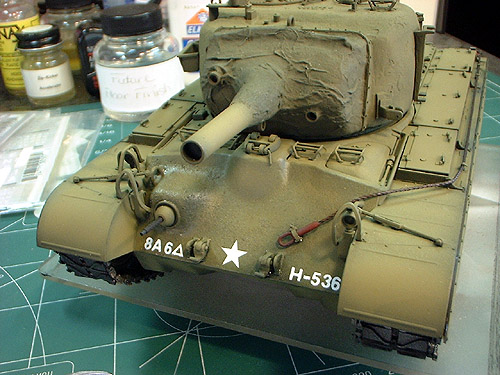
Next,
I moved into placing the markings on my
miniature before anymore weathering and
detailing would take place. It appears in
historical photos of the M45 Pershing in
Korea that they bore little in the way of
markings - from what you can see of them. I
welcomed this, as it allowed me to move
swiftly in placing them on my model tank.
Using
the color plate in Squadron Signal's
reference book, I marked my model of "HELEN"
accordingly. To begin the process, I
hand-painted on a light coat of acrylic
Future Floor Finish to the areas of my model
that would receive dry-transfers. With the
cast texture already present on Tamiya's
Hull, the MB Models resin Turret, and what I
enhanced, the undercoat of Future would give
a good surface for the dry-transfers to
"hold" onto during the application process.
I went with 4" non-stenciled letters and
codes - taken from Railroad Scenics' white
gothic letter sheet #DT-507. I used 10"
National Symbols from Archer Fine Transfers'
sheet #AR35021 - as these appeared about
right for the markings in the photos I used.
Invariably, applying dry-transfers sometimes
isn't easy. I place my model on a plastic
turntable to spin it around easily during
the painting and finishing stages. It makes
it easier to keep my hands off of it, but
won't prevent the occasional dry-transfer
"break" if not burnished down completely. I
touched up any little problems with Tamiya
XF-2 Flat White. When done, I went back and
applied another light coat of Future Floor
Finish to seal the dry-transfers in place
and protect them from subsequent finishing
stages on my model.
Not
having an overhead nor rear view of "HELEN",
or any other M45 Pershing, that I could make
out locations for adding codes, I made a
guess based on photos of all the locations
other Pershing units marked their vehicles.
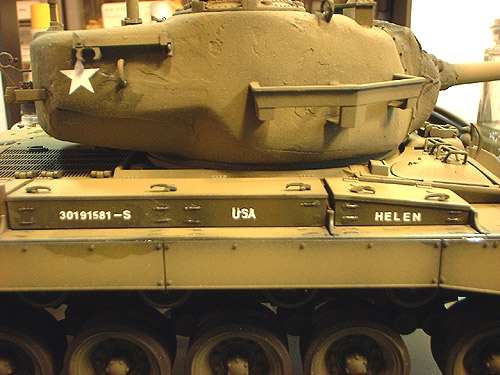
I used
a smaller sized set of lettering from
Railroad Scenics #DT-575 set of
dry-transfers to complete "HELEN" and the
Registration Numbers on the sides of the
Sponson Boxes. Always save scrap decal
sheets. The lettering and numbers are too
small for me to comfortably apply free-hand
to the sides of the Sponson Boxes like I did
the codes on the front and rear of the
model. So, I applied them to an open section
of scrap decal paper. I lightly over-coated
them with MicroMark #82276 "Last Step"
Inkjet Decal Spray Fixative. In the past,
I've used Gloss Cote lacquers - but, one
burst too heavy - and the lacquer coat will
disintegrate the fragile dry-transfers. You
only want the lacquer coat or fixative to
form a thin carrier film over the
dry-transfers, allowing you to apply them to
the model like a traditional waterslide
decal. These went on without a problem.
That
wrapped up the markings I wanted to add to
my model miniature - and since I took my
time it came inside of three hours - with
lots of leisurely surfing on the Internet
while waiting for the Future Floor Finish to
dry sufficiently to move on. I tried to keep
the lettering and numbers as straight as I
could - but didn't try to make them ram-rod
perfect. Looking at the photos, it seems
neither did the crews.
With
the decals set and protected in place, I
would then proceed to lightly Gloss Cote the
model overall to even up the finish after
the decaling and applications of Future
Floor Finish. I let the Gloss Cote dry
overnight, and then I Dull Cote the model to
set the stage for end assembly and final
weathering - next page.

|